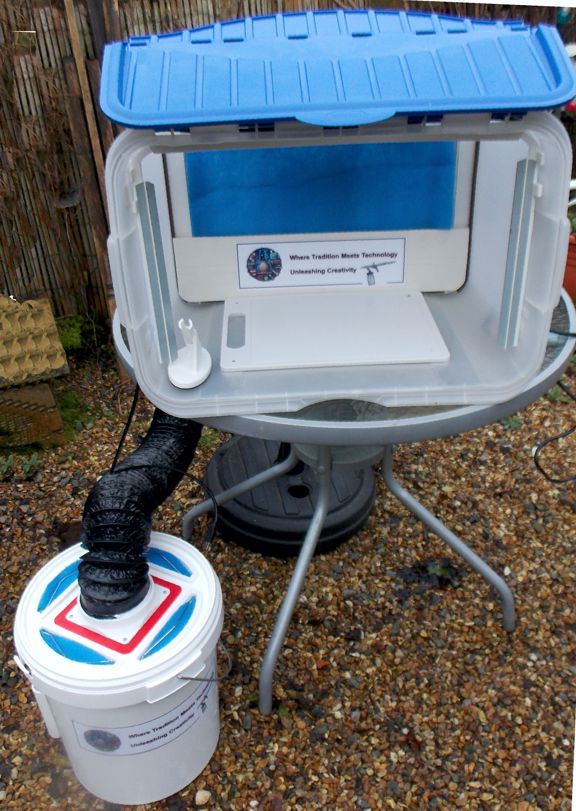
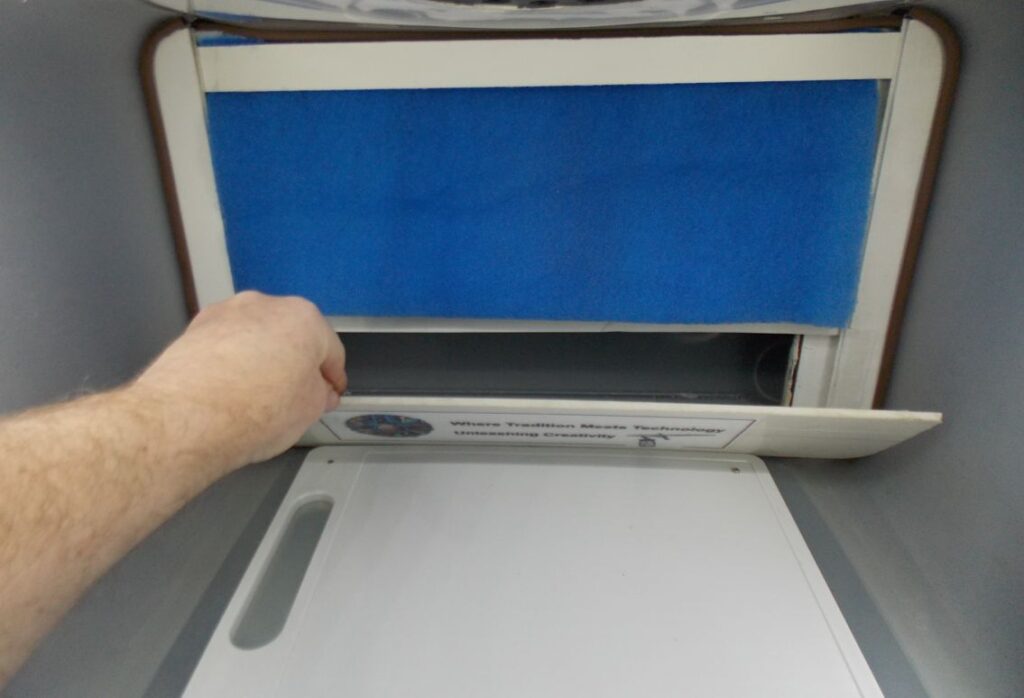
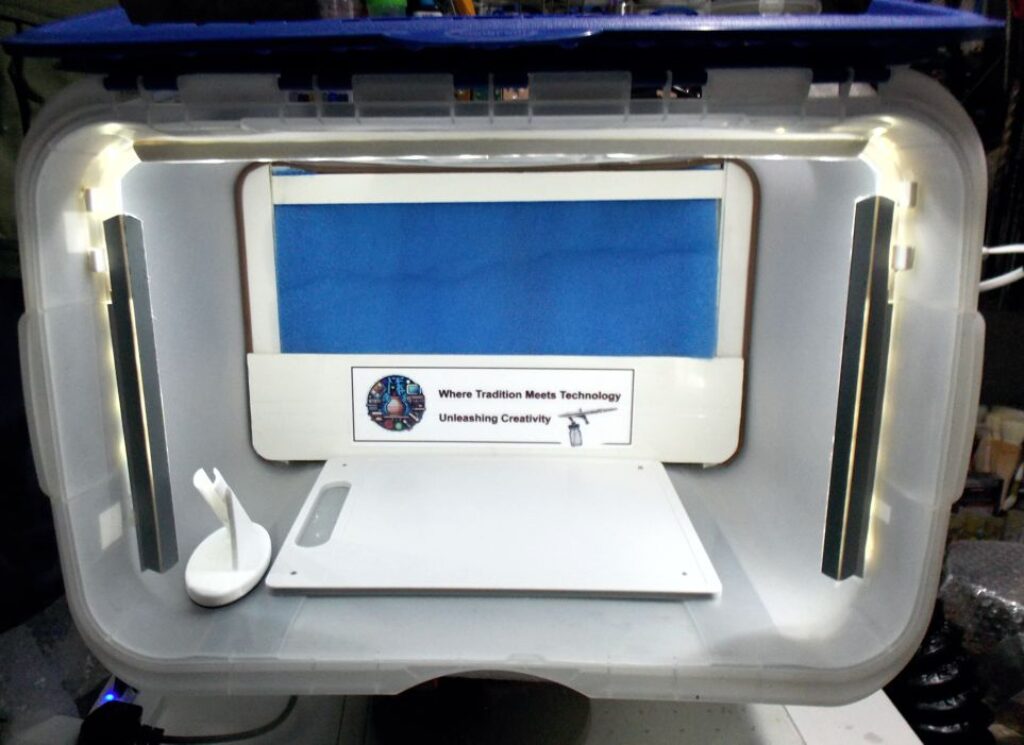
Recently, I took on the challenge of crafting a 3D object that needed a splash of colour. To kick off this endeavour , I utilized an airbrush to apply a primer, which laid the groundwork for the use of acrylic paints. I realized that using a primer significantly improved the final appearance of the project. To effectively operate the airbrush and manage any overspray, I needed a method to clear away any excess mist in the area where I was airbrushing and devised a solution to ensure the air was adequately filtered. I chose a plastic box with a foldable lid for this purpose. This foldable aspect proved to be particularly beneficial, as it allowed the box to double as a drying station; by folding down the front door while maintaining air gaps on the sides, I could enhance airflow, which helps dry the items inside more efficiently.
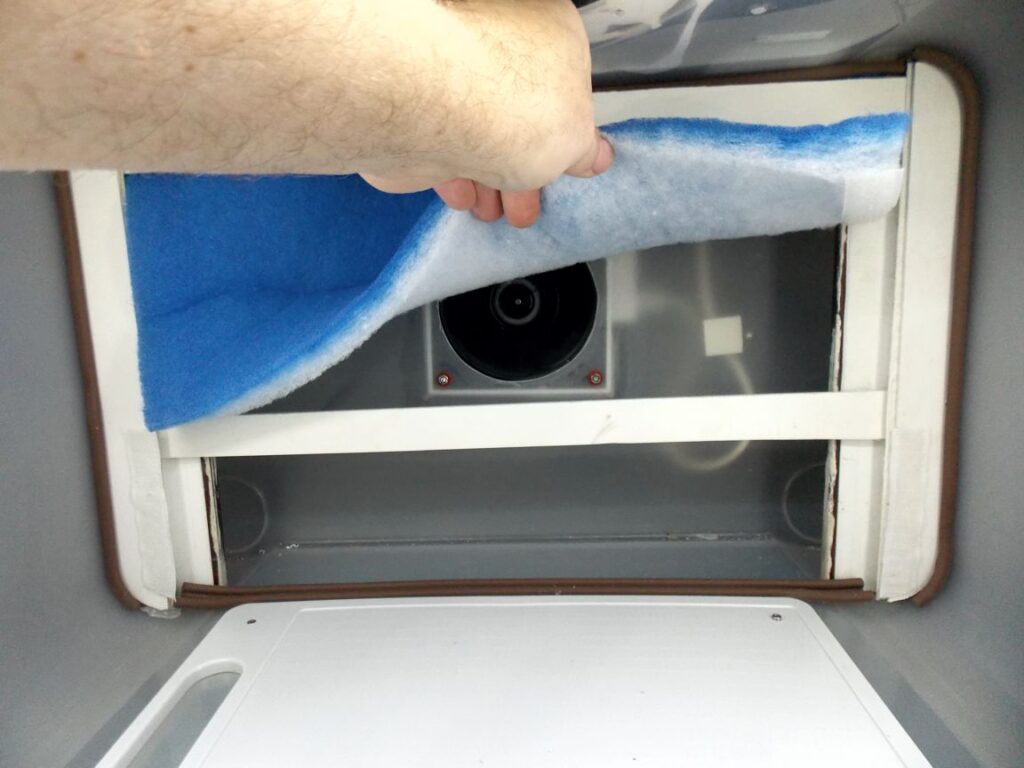
Choosing the right fan was essential for my setup. In my search through spare parts, I found a fan from a hot steam humidifier that was perfectly suited to my requirements since it is sealed and can handle high humidity. The next step involved designating a specific area within the plastic box for a prefilter, ensuring there was adequate space between the filter and the exhaust fan. I accomplished this by attaching two strips of plastic on the inside to create a small chamber.
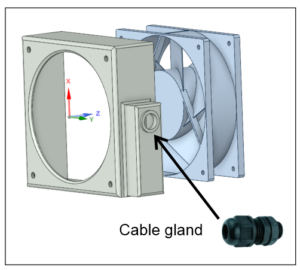
Following this, I cut a circular hole to mount the fan, which runs on 230 V AC. It was crucial to create a 3D-printed casing for the fan to protect the internal wiring connections. To manage the fan’s speed, I employed a variable speed controller that I had ordered online; this unit includes an internal fuse, a power switch, and a variable speed dial all in one compact form. Additionally, the speed controller has an external plug socket, allowing me to connect a flexible cord to the fan that plugged directly into the controller.
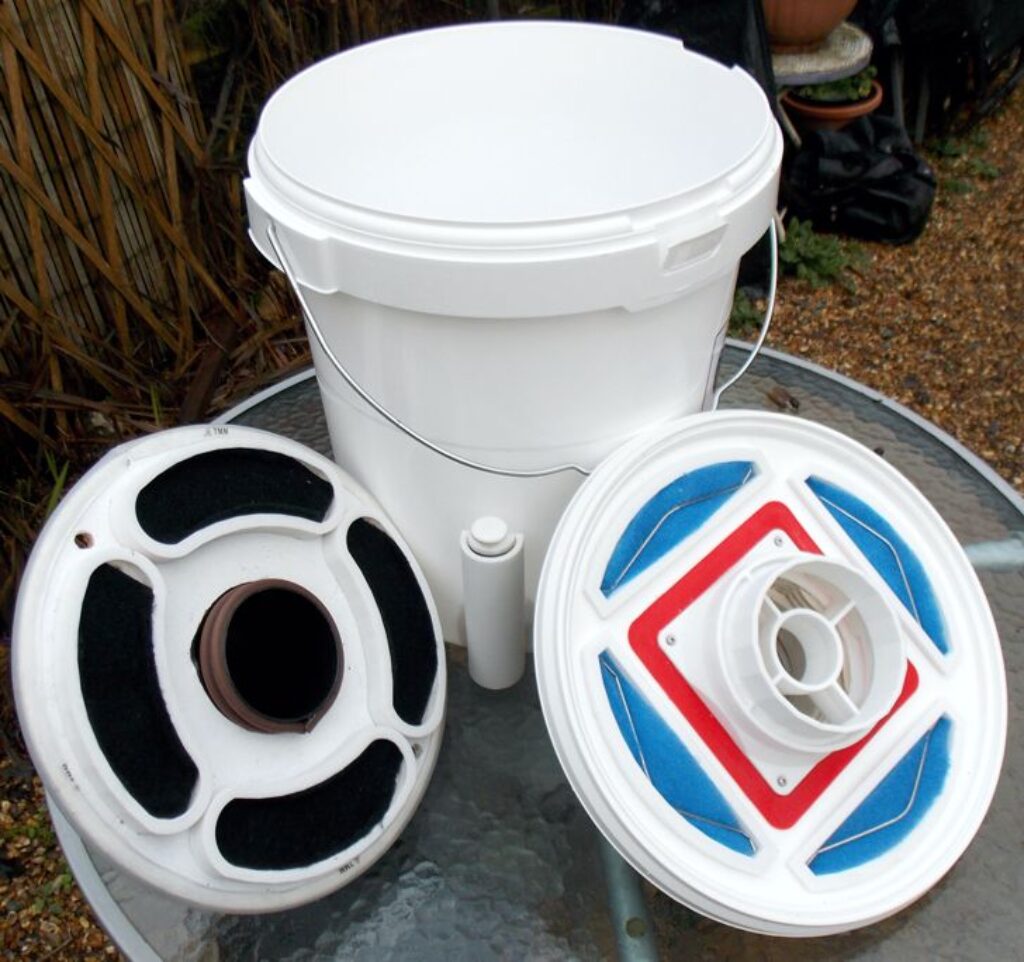
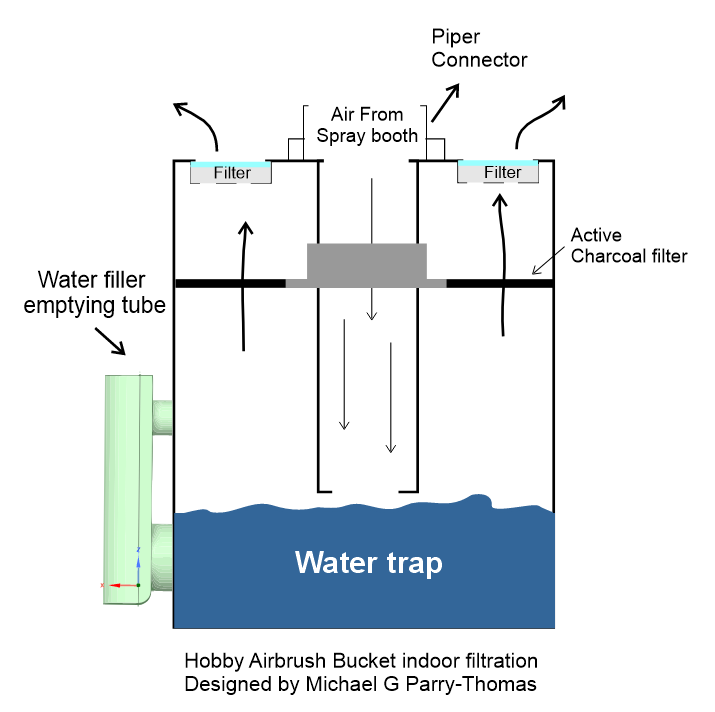
Afterward, I focused on designing a bucket-style indoor filtration system. Having watched various YouTube tutorials, I became somewhat intimidated by the range of designs available, thus choosing to construct a design rooted in my understanding of organic fume filtration. The principal challenge was directing airflow into a large container that holds around 2 liters of water to capture airborne particles generated during the spraying process in the booth.
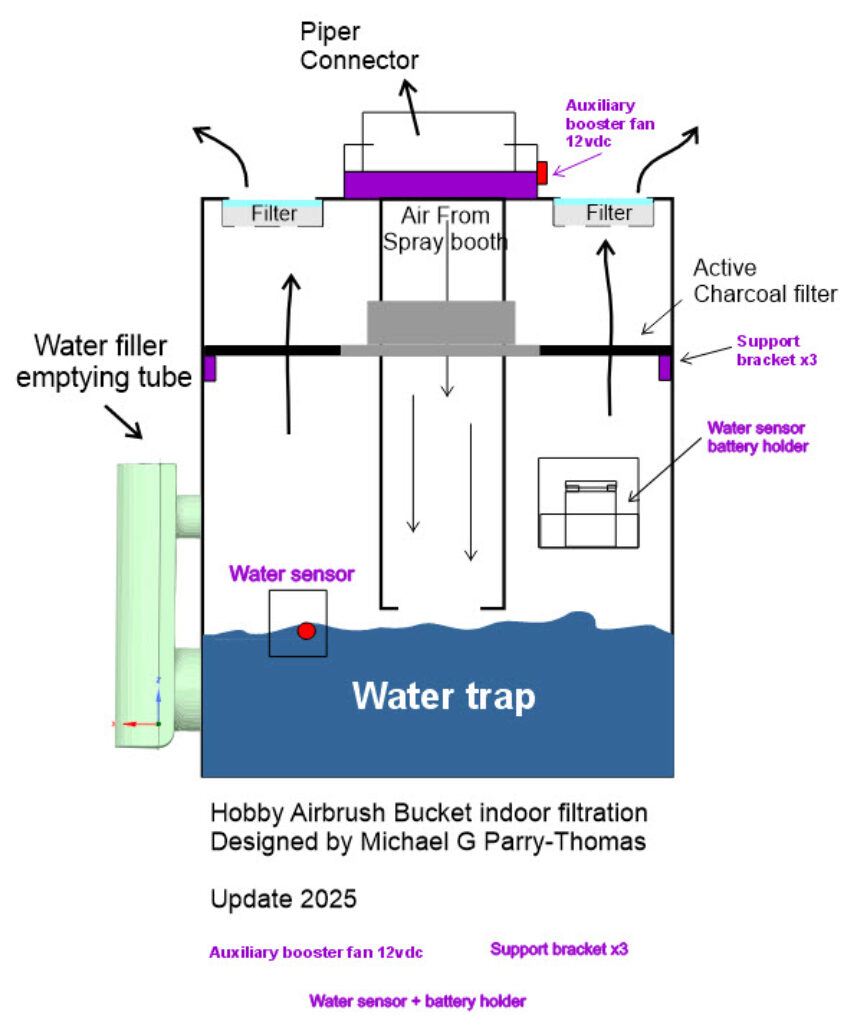
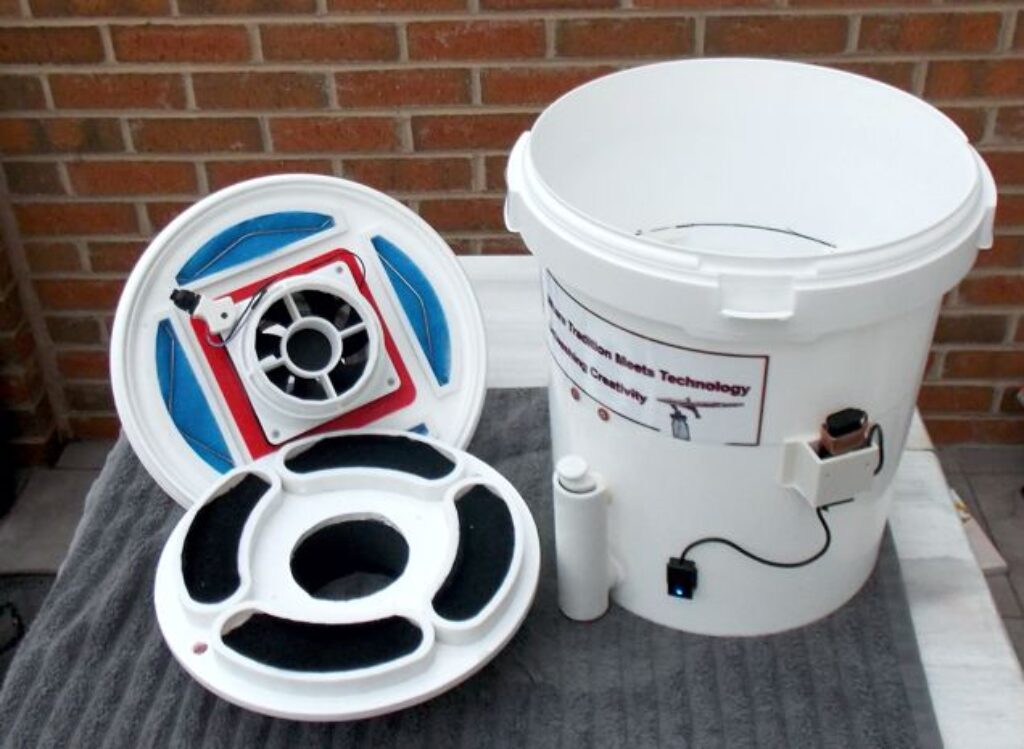
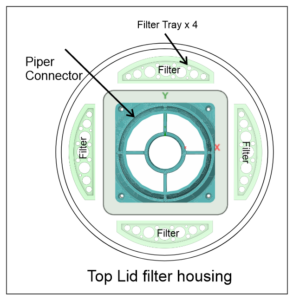
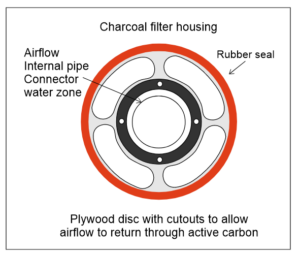
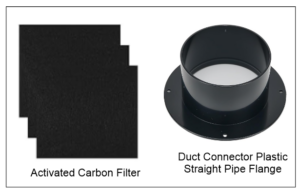
The airbrush spray booth is equipped with a primary filter for initial overspray, followed by air that travels through a pipe into a lower container filled with water to collect fine particles. Many filtration systems I noticed involved air passing through holes at the top of the bucket, sometimes simply featuring filters placed atop, which could hinder their efficiency. I was particularly cautious about the possibility of strong airflow, which could atomize the water and reintroduce organic materials into the working area. To mitigate this issue, I designed and 3D printed individual trays fitted with charcoal filters that offer an extra layer of protection. After passing through the water, the airflow is required to go through the charcoal filter before proceeding through additional filtration stages before it is returned to the environment. This system incorporates four stages of filtration: the prefilter in the airbrush booth, the water trap, the charcoal filter, and ultimately another set of filters for clean air return.
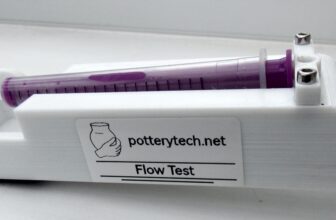
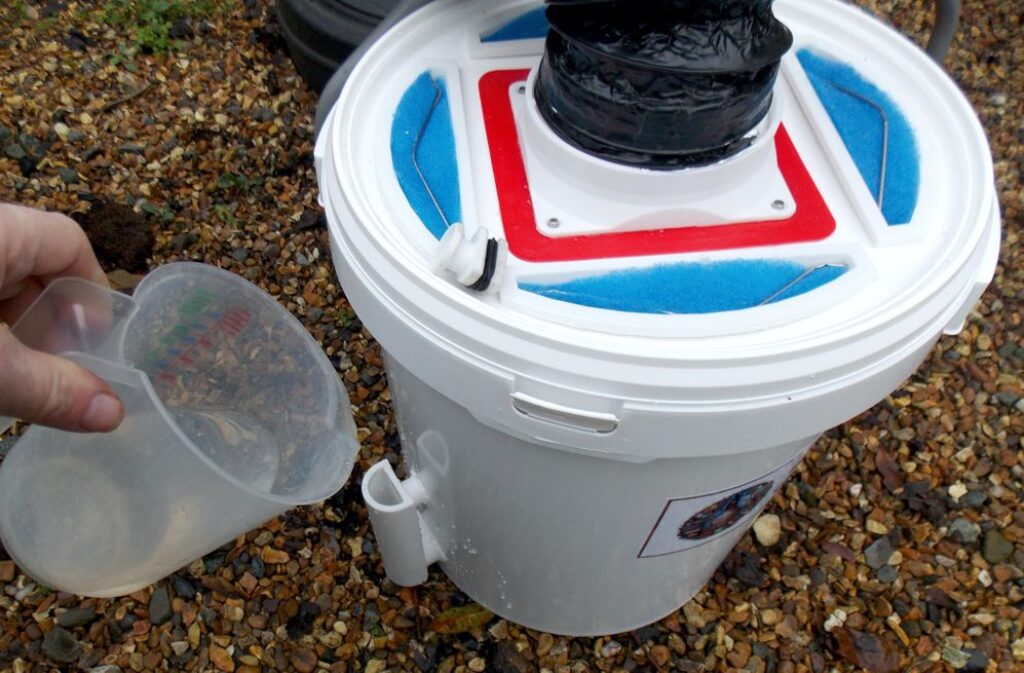
This type of system necessitates water at the bottom of the container. To make the process of adding water easier without removing filters, I designed and 3D printed a water filling tube. After filling the water to the desired level, I simply put a sealed lid on it. This arrangement is very user-friendly, allowing easy drainage and replenishment of water for cleaning when required.
Balancing the airflow is crucial. If the fan is too powerful, it could disrupt the water’s surface. Thus, selecting a fan that efficiently controls overspray within the booth while enabling continuous airflow through a vent tube—generally leading outside via a window—is vital. Regardless of the system employed, wearing a respirator mask during airbrushing is of paramount importance. The mask must correspond to the materials being sprayed, as there are numerous types of respirators and filtration methods available. Always ensure you use the appropriate one in accordance with the paint manufacturer’s recommendations.
While my filtration system may appear complex, I firmly believe that safeguarding oneself from organic materials and spray particles is of the utmost importance. I hope my design can inspire others to enhance it and establish a safe indoor filtration setup.
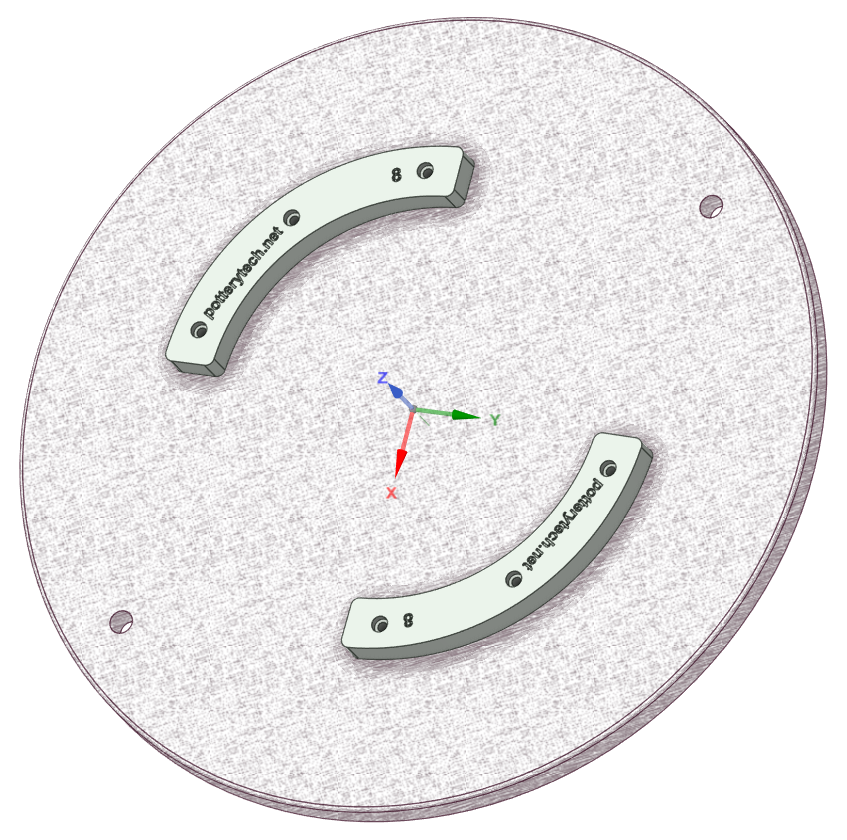
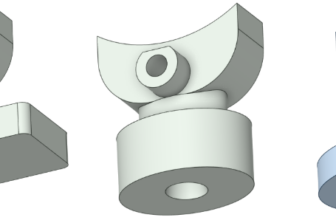
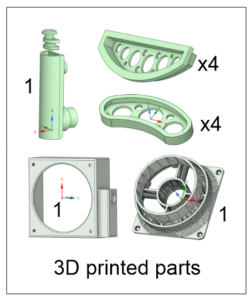
For the purpose of designing the components intended for 3D printing, I employed DesignSpark Mechanical CAD software. Once the components were finalized, I proceeded to 3D print them using PETG filament, which is known for its durability and ease of use. The printing was carried out on a customized Voxelab Aquila X2 printer, which features a direct drive system that offers improved filament feeding and precision during the printing process.


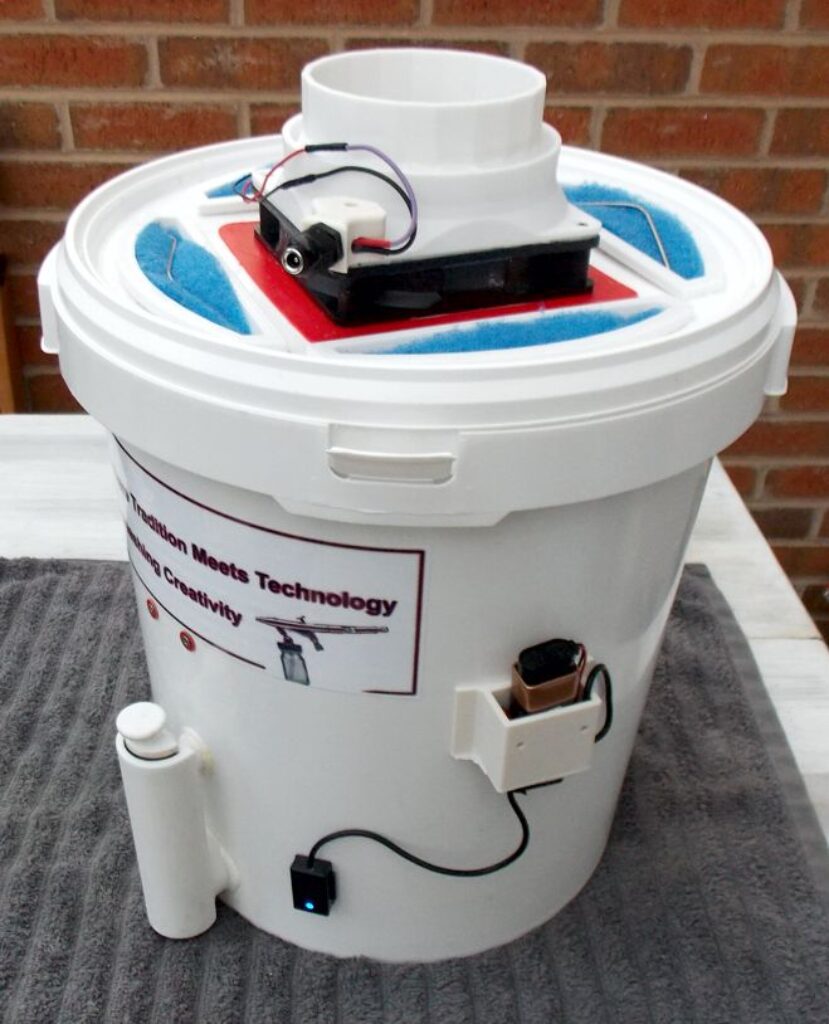
The updated design for the 3D printed components in a hobby spray booth now includes enhanced features such as an additional auxiliary fan to boost airflow and a water level sensor. This system is tailored for scenarios where venting the air outside is not feasible while using a hobby spray booth. This new, upgraded version comes with numerous improvements. Given that hobby spray booths can cause the pre-filter and small fan to degrade over time, I opted to integrate an auxiliary fan at the top of the filtration bucket in this latest iteration. This fan can be activated to enhance filtration efficiency as the pressure inside the bucket rises, allowing clean air to be reintroduced into your workspace. Additionally, there is a water sensor located at the front of the bucket, serving two essential functions. Firstly, it’s crucial to maintain a layer of water in the bucket, which helps trap any contaminants that pass through the pre-filters. The water sensor features an LED indicator; when the water level is at the appropriate height, the light will illuminate. It’s easy to overlook the need to replenish the water, so this feature acts as a helpful reminder to check your filtration system. As time progresses and the water level decreases, the LED will turn off, signaling that it’s time to drain the dirty water from the system and refill it to the proper level. It’s also a good idea to inspect the internal filters regularly, as these will inevitably require replacement over time. By implementing this design, you benefit from a comprehensive four-stage filtration system, ensuring that clean air continuously flows into your work area.